How to Create an Email Account in cPanel
Creating a professional email address with your own domain name (like [email protected]) is one of the best features of your hosting plan. This guide will show you exactly how to create your first email account using cPanel.
Important Note About Security
Before you start using your email, we strongly recommend that you activate the free SSL certificate for your domain. This will encrypt your emails and keep your login details safe. Please follow our guide here first:
How to Run AutoSSL and Force HTTPS.
How to Create Your Email Account
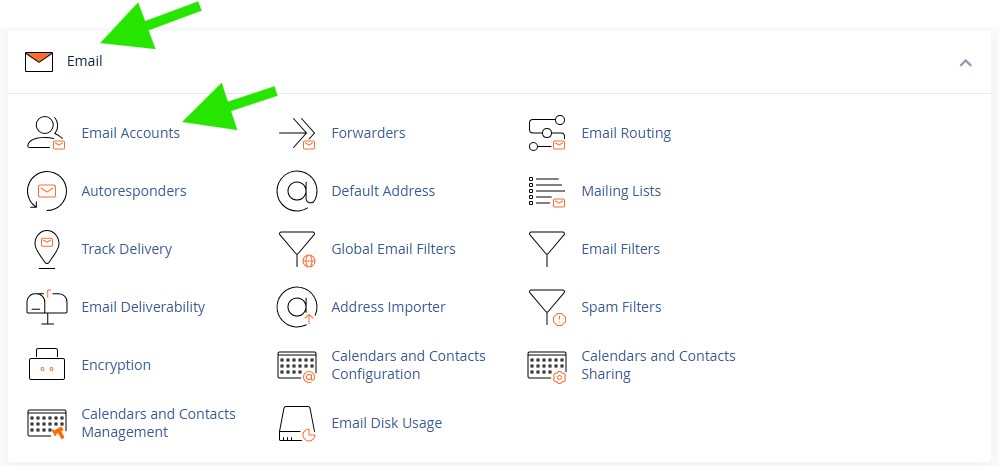
1. Log in to your cPanel control panel.
2. In the "Email" section, click on the Email Accounts icon.
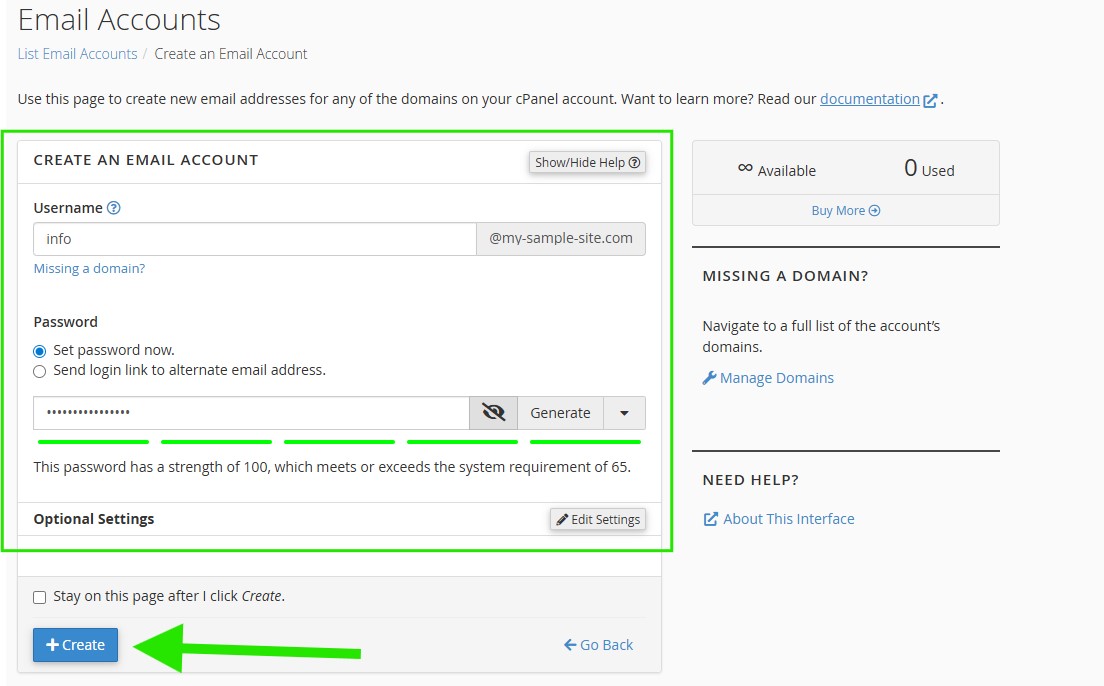
3. Click the blue +Create button on the right side of the page.

4. Username: Type the first part of the email address you want (for example: info, support, or your.name).
5. Domain: If you have more than one domain, make sure you select the correct one from the dropdown menu.
6. Password: Enter a strong password for the account, or use the Password Generator to create one.
7. Click the +Create button to finish.
Your new email account is now ready to use!
Tip for Creating Multiple Accounts
If you need to create several email accounts, check the box that says "Stay on this page after I click Create." This will keep you on the creation screen so you can quickly add the next account.
